Most small campgrounds still take a lot of reservations the old way. A guest calls, you check the paper book or the spreadsheet, you read out what’s open, and you take a card number over the phone. It works, until the phone rings during check-in, two people want the same site for the Fourth of July, or a guest emails at 10 p.m. and books somewhere else before you answer. Campground booking software lets guests reserve and pay on their own, any time, while you keep control of your sites, rates and calendar.
This guide walks through the practical path from phone and paper to online booking at a small campground or RV park: what has to be in place, in what order, and what changes for you and your front desk.
What campground booking software actually does
At its core, campground booking software is a booking engine connected to your site list and your calendar. A guest picks dates, sees which campsites, RV sites or cabins are available, chooses one, pays, and gets a confirmation. The reservation lands on the same calendar your front desk uses, so the site is no longer offered to anyone else.
Many tools sell this as one piece of a larger campground management software package, with point of sale, payments, email marketing and reporting as add-ons. For a small park, the important part is that online booking and the front desk share one calendar. If they don’t, you’re back to copying reservations from one system to another.
Step 1: Get your site list and rates in order
Before anything goes online, write down every site you rent and what makes each one different:
- Site types: full hookup RV sites, water and electric, tent sites, cabins, group sites.
- Details guests ask about: amps, pull-through or back-in, maximum RV length, distance to the bathhouse, lake or road side.
- Rates: nightly rates by site type, weekend and holiday rates, and any minimum stays.
- Rules: check-in and check-out times, pet rules, and how many people and vehicles a site allows.
This list becomes your booking setup. The clearer it is, the fewer calls you’ll get asking “will my 38-foot fifth wheel fit on site 12?”
Step 2: Put a booking page on your website
Your campground’s website is where most guests find you, so that’s where online booking belongs. A booking page or “Book Now” button lets a guest go from your homepage to a confirmed reservation without calling. It should:
- Work well on a phone, since most campers book from one.
- Let guests filter by site type and see only what’s available for their dates.
- Show a site map, so guests can pick the spot by the water or away from the road.
- Not make guests download an app or create an account before they can book.
If you also list on third-party sites or an OTA, ask how those bookings reach your calendar. Some parks keep their own website as the main place to book, because there’s no commission on direct bookings.
Step 3: Show live availability
Double bookings happen when the online calendar and the front desk book from different lists. With live availability, a site booked online disappears from the front desk screen immediately, and a site booked at the desk disappears online. Everyone works from one calendar, and you stop keeping a “just in case” buffer of sites off the market.
Step 4: Take payment at the time of booking
Online payments at booking mean the reservation is paid, or at least started, before the guest arrives. That cuts down on no-shows and on chasing balances at check-in. Ask which payment processors the software supports and whether you can keep the one you already use. Policies like deposits, partial payments, cancellations and refunds are worth talking through with whoever sets up your system, so they match how your park already runs.
If a guest doesn’t finish paying online, a pay link sent by text or email lets them pay from their phone. A QR code at the office or on a sign does the same for walk-ups.
Step 5: Let confirmations go out on their own
Once a reservation is made, the guest should get a confirmation and a receipt automatically, by email and text. That’s one less thing to do at the end of a long day, and it answers the “did my booking go through?” call before it happens. Some systems can also send follow-ups to past guests later, such as a thank-you or an offer for next season.
Step 6: Keep the front desk on the same calendar
Online booking doesn’t replace the phone or walk-ins. It just means they’re handled the same way. When someone calls, your staff open the front desk booking screen, pick dates, see open sites, add the site, and let the software add up the total. The phone booking and the online booking end up on the same calendar, with the same rates. Camp store items like firewood and ice can go on the same order.
For seasonal staff, this matters a lot. A simple screen is something a new hire can learn in an afternoon.
How long does it take to switch to online booking?
It depends on your property. With Camp Manager, we load your sites, rates and map with you, connect payments and put the booking page on your website. We estimate about two weeks to go live, depending on your property, and we’ll give you a firmer timeline in the walkthrough. The off-season is a good time to set it up, because the park is quiet.
If you’re bringing reservations over from another system, or keeping another tool in the mix, ask about integration. Camp Manager can connect to other reservation software through an API or Zapier, and we’ll look at your specific setup together.
Try it the way your guests would
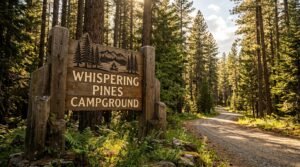
The fastest way to understand campground booking software is to book a site yourself. Our live demo is Whispering Pines, a sample campground with sample data. Pick dates, filter by site type, switch to the map and walk through a reservation from start to finish.
Still comparing options? Read Campground Reservation Software for Small Parks: What to Look For.
Right now Camp Manager is 90 days free, with $10 a month in communication credits included. Book a 30-minute walkthrough to see how online booking would work at your campground, or tap More Info to ask a question.